Status Pages
Create a status page
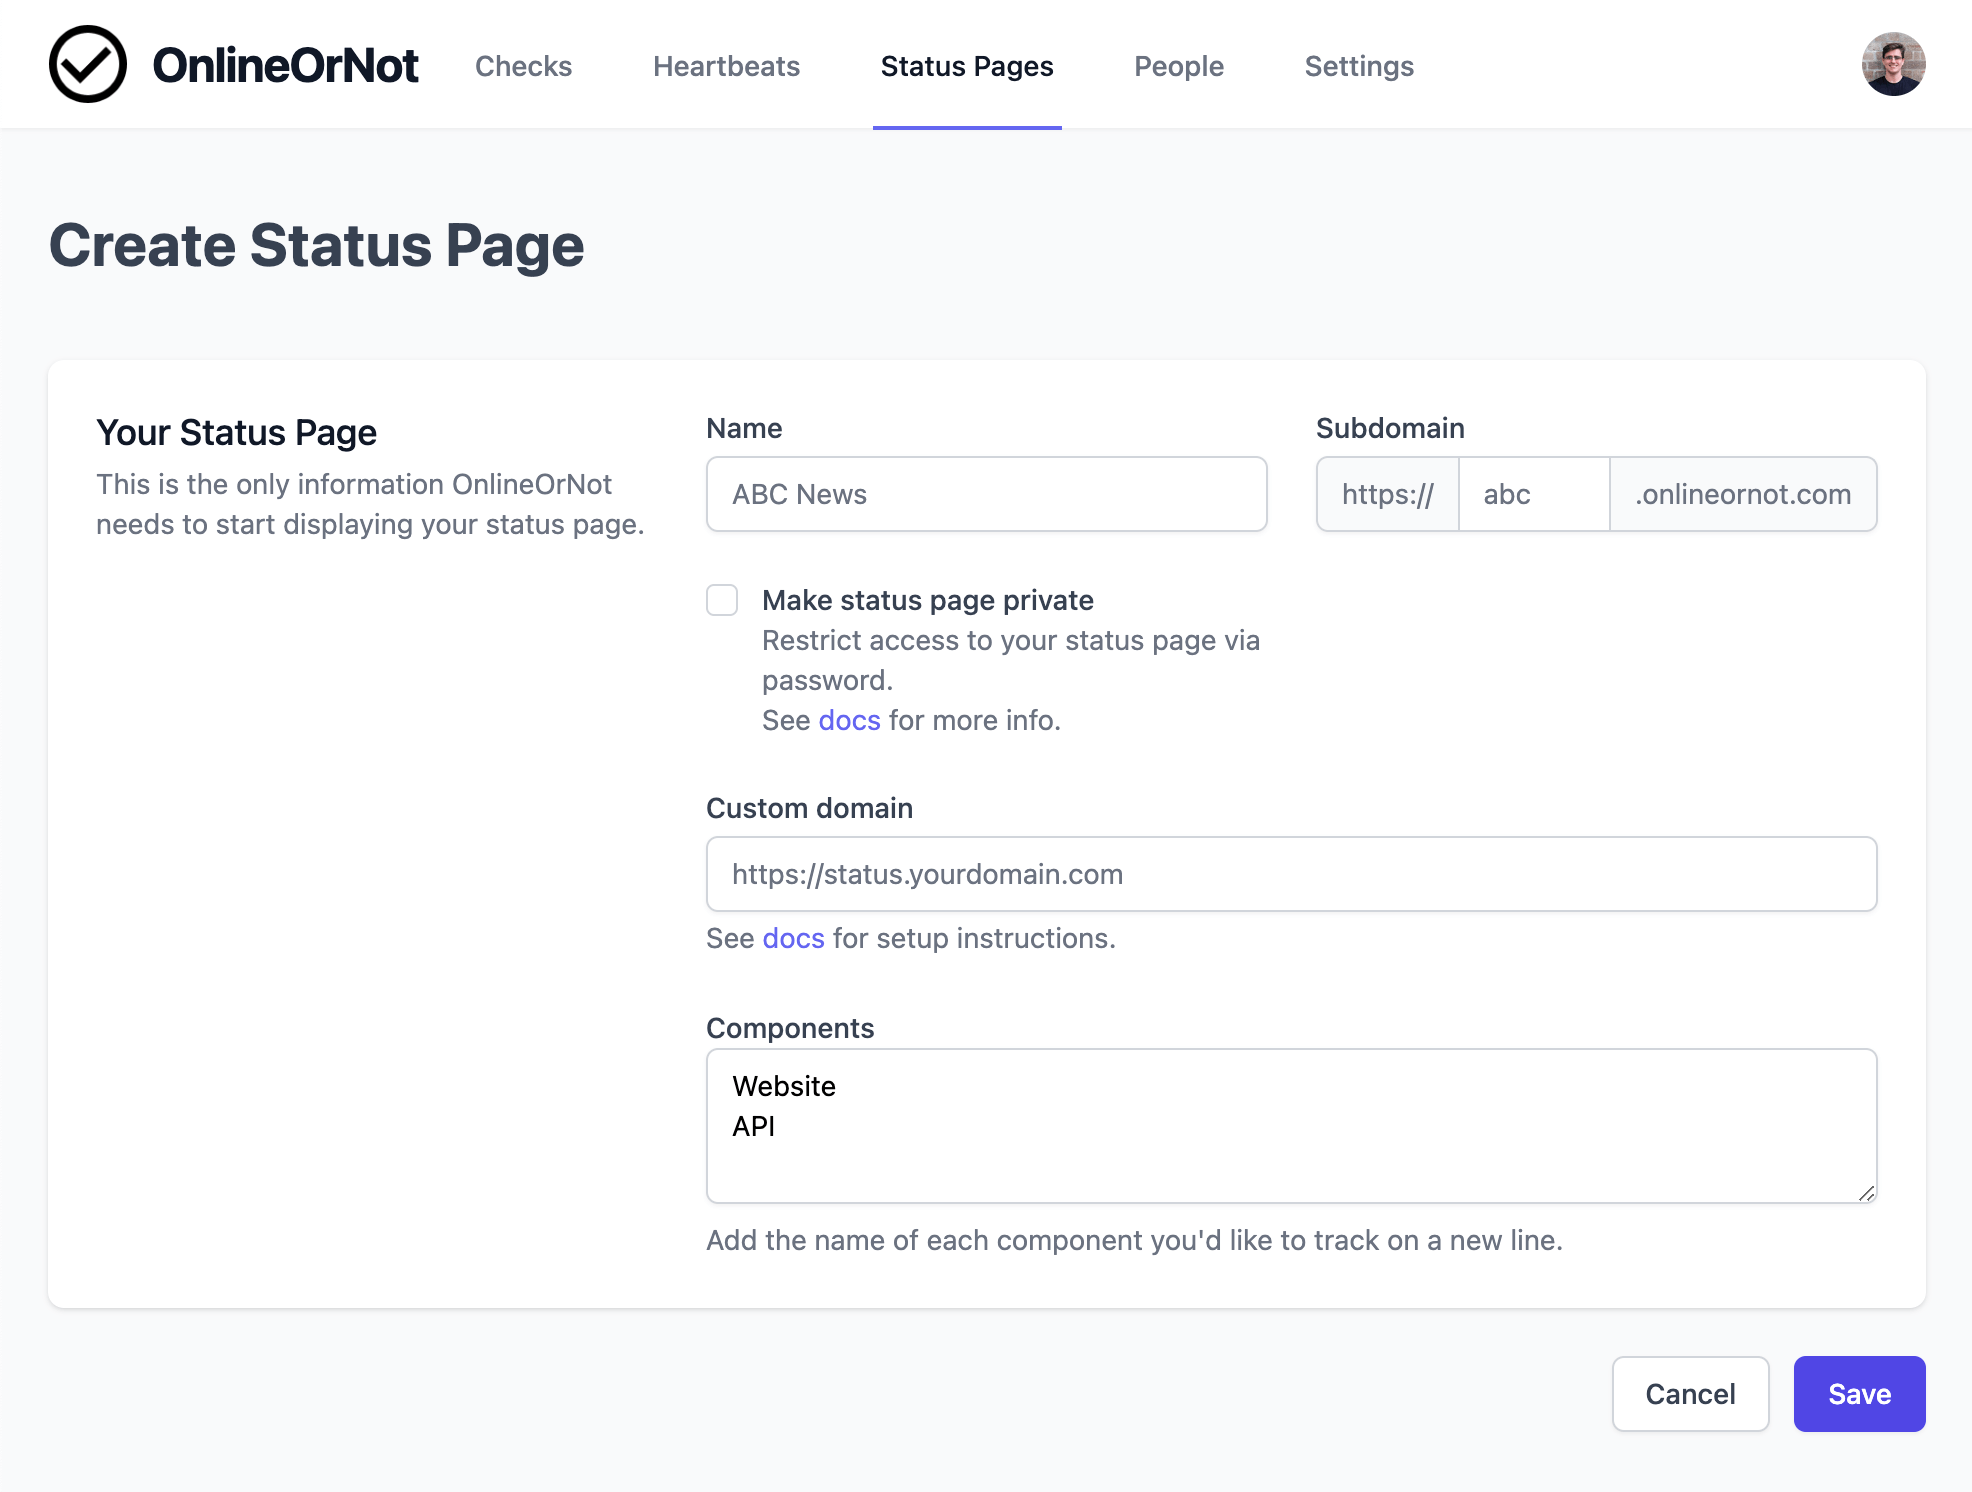
Navigate to the status page dashboard, then click Create status page.
Select "Create a public status page" and enter a name and subdomain:
Custom domains
To use your own domain (like status.yourdomain.com), see Custom domains.
Components
Status pages report on components (your website, API, etc.). OnlineOrNot adds "Website" and "API" by default. You can customize these later.
See Components to learn more about how components work.
Done
After saving, you'll be redirected to the dashboard. Your status page is now live and ready to show customers.