Uptime Monitoring
Monitor cron jobs and scheduled tasks
Navigate to the heartbeats dashboard, then click Add heartbeat.
Enter a name, reporting period, and grace period:
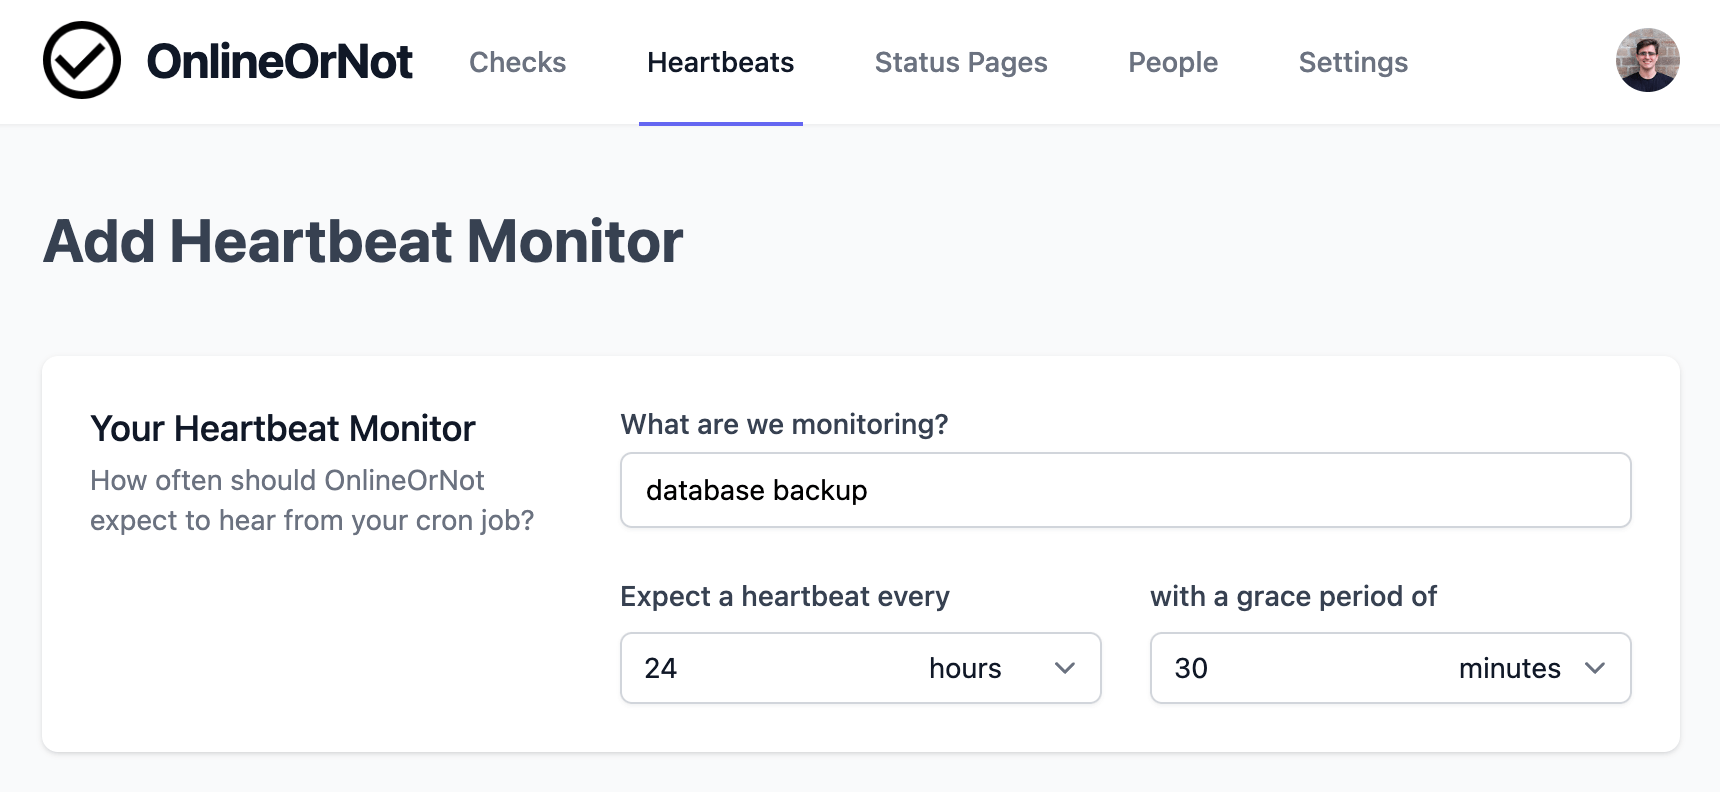
Reporting period
The "Expect a heartbeat every" field is the reporting period. Enter how often your cron job runs.
Example: A daily database backup would use 24 hours.
Grace period
The grace period is how late the job can be before OnlineOrNot alerts you.
Example: If your backup can run up to 30 minutes late, enter 30 minutes.
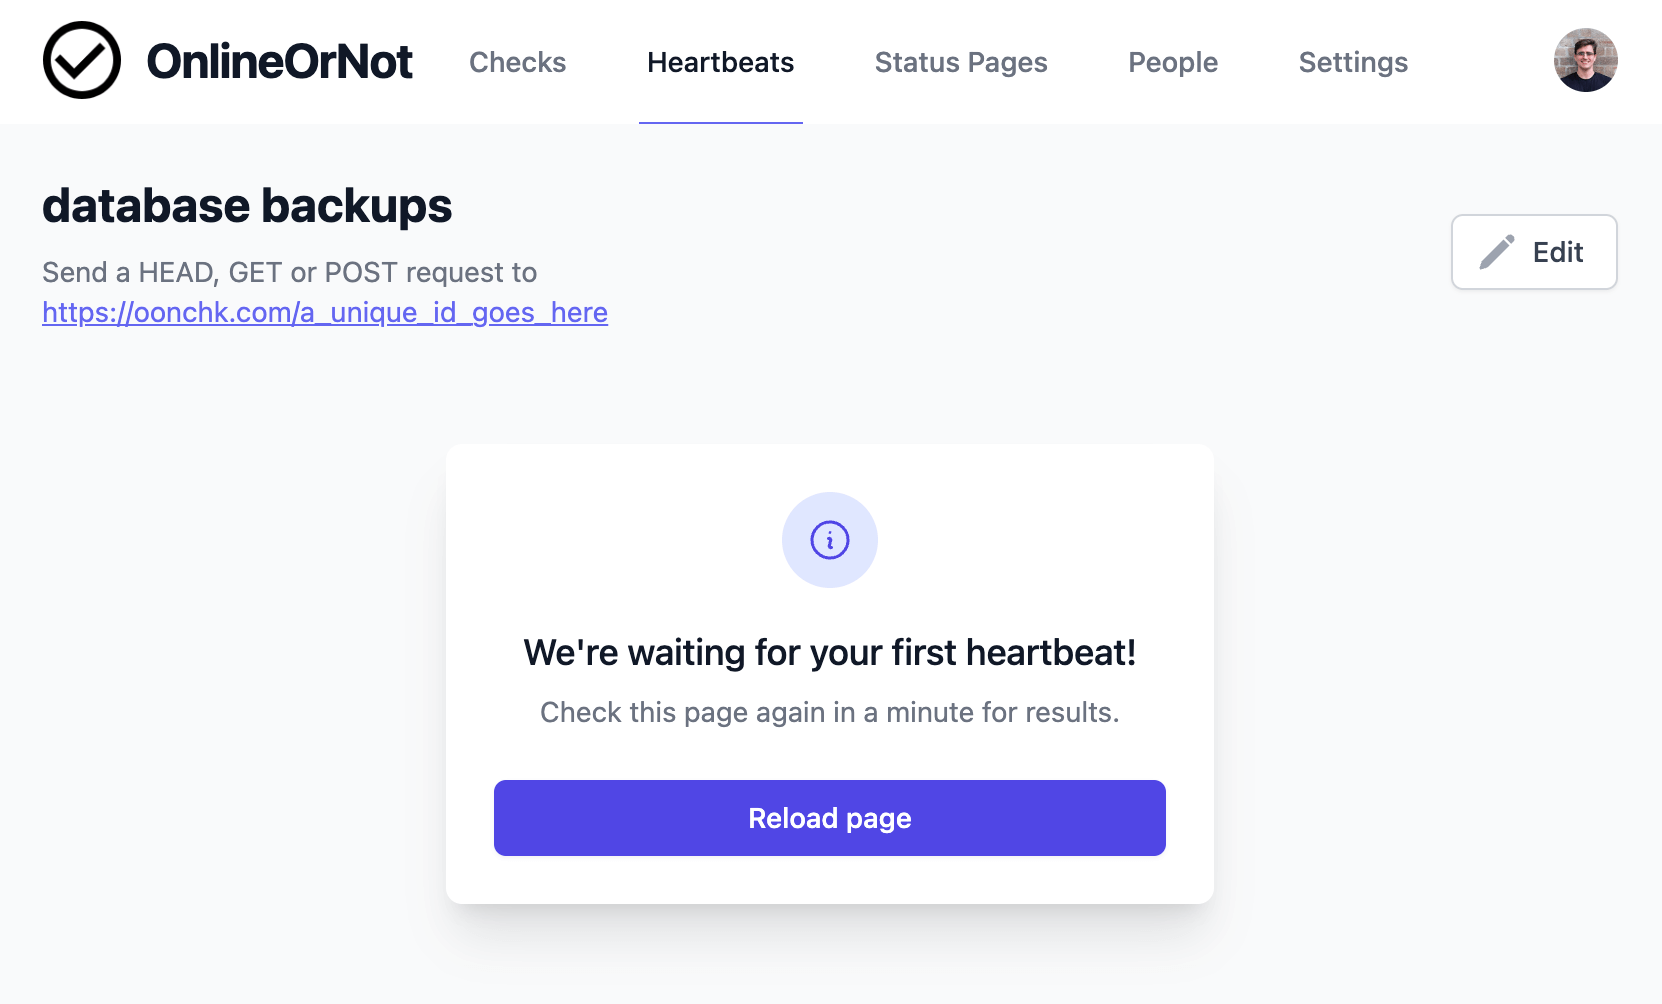
Get your heartbeat URL
After saving, you'll see the URL for your check:
Add the heartbeat to your job
Add a curl request to your cron job:
# my crontab
30  18  *   *   *   backup_db_to_r2 && curl https://oonchk.com/xxxxxxxxx
The && ensures the heartbeat only fires if the job succeeds.