Status Page Integrations
Make an Uptime Robot Status Page
Note: you will need to repeat these steps for each status page component that you want Uptime Robot to monitor.
What this integration does
Whenever your Uptime Robot check changes its status to Down, it will notify OnlineOrNot, and an incident will be automatically created on your OnlineOrNot status page.
Similarly, when the Uptime Robot check changes its status back to Up, it will notify OnlineOrNot, and the incident will be resolved automatically.
OnlineOrNot Settings
- Open the OnlineOrNot Web App
- Click on Status Pages in the top menu
- Click on the status page you want to add uptime monitoring to
- Click on Components in the secondary menu
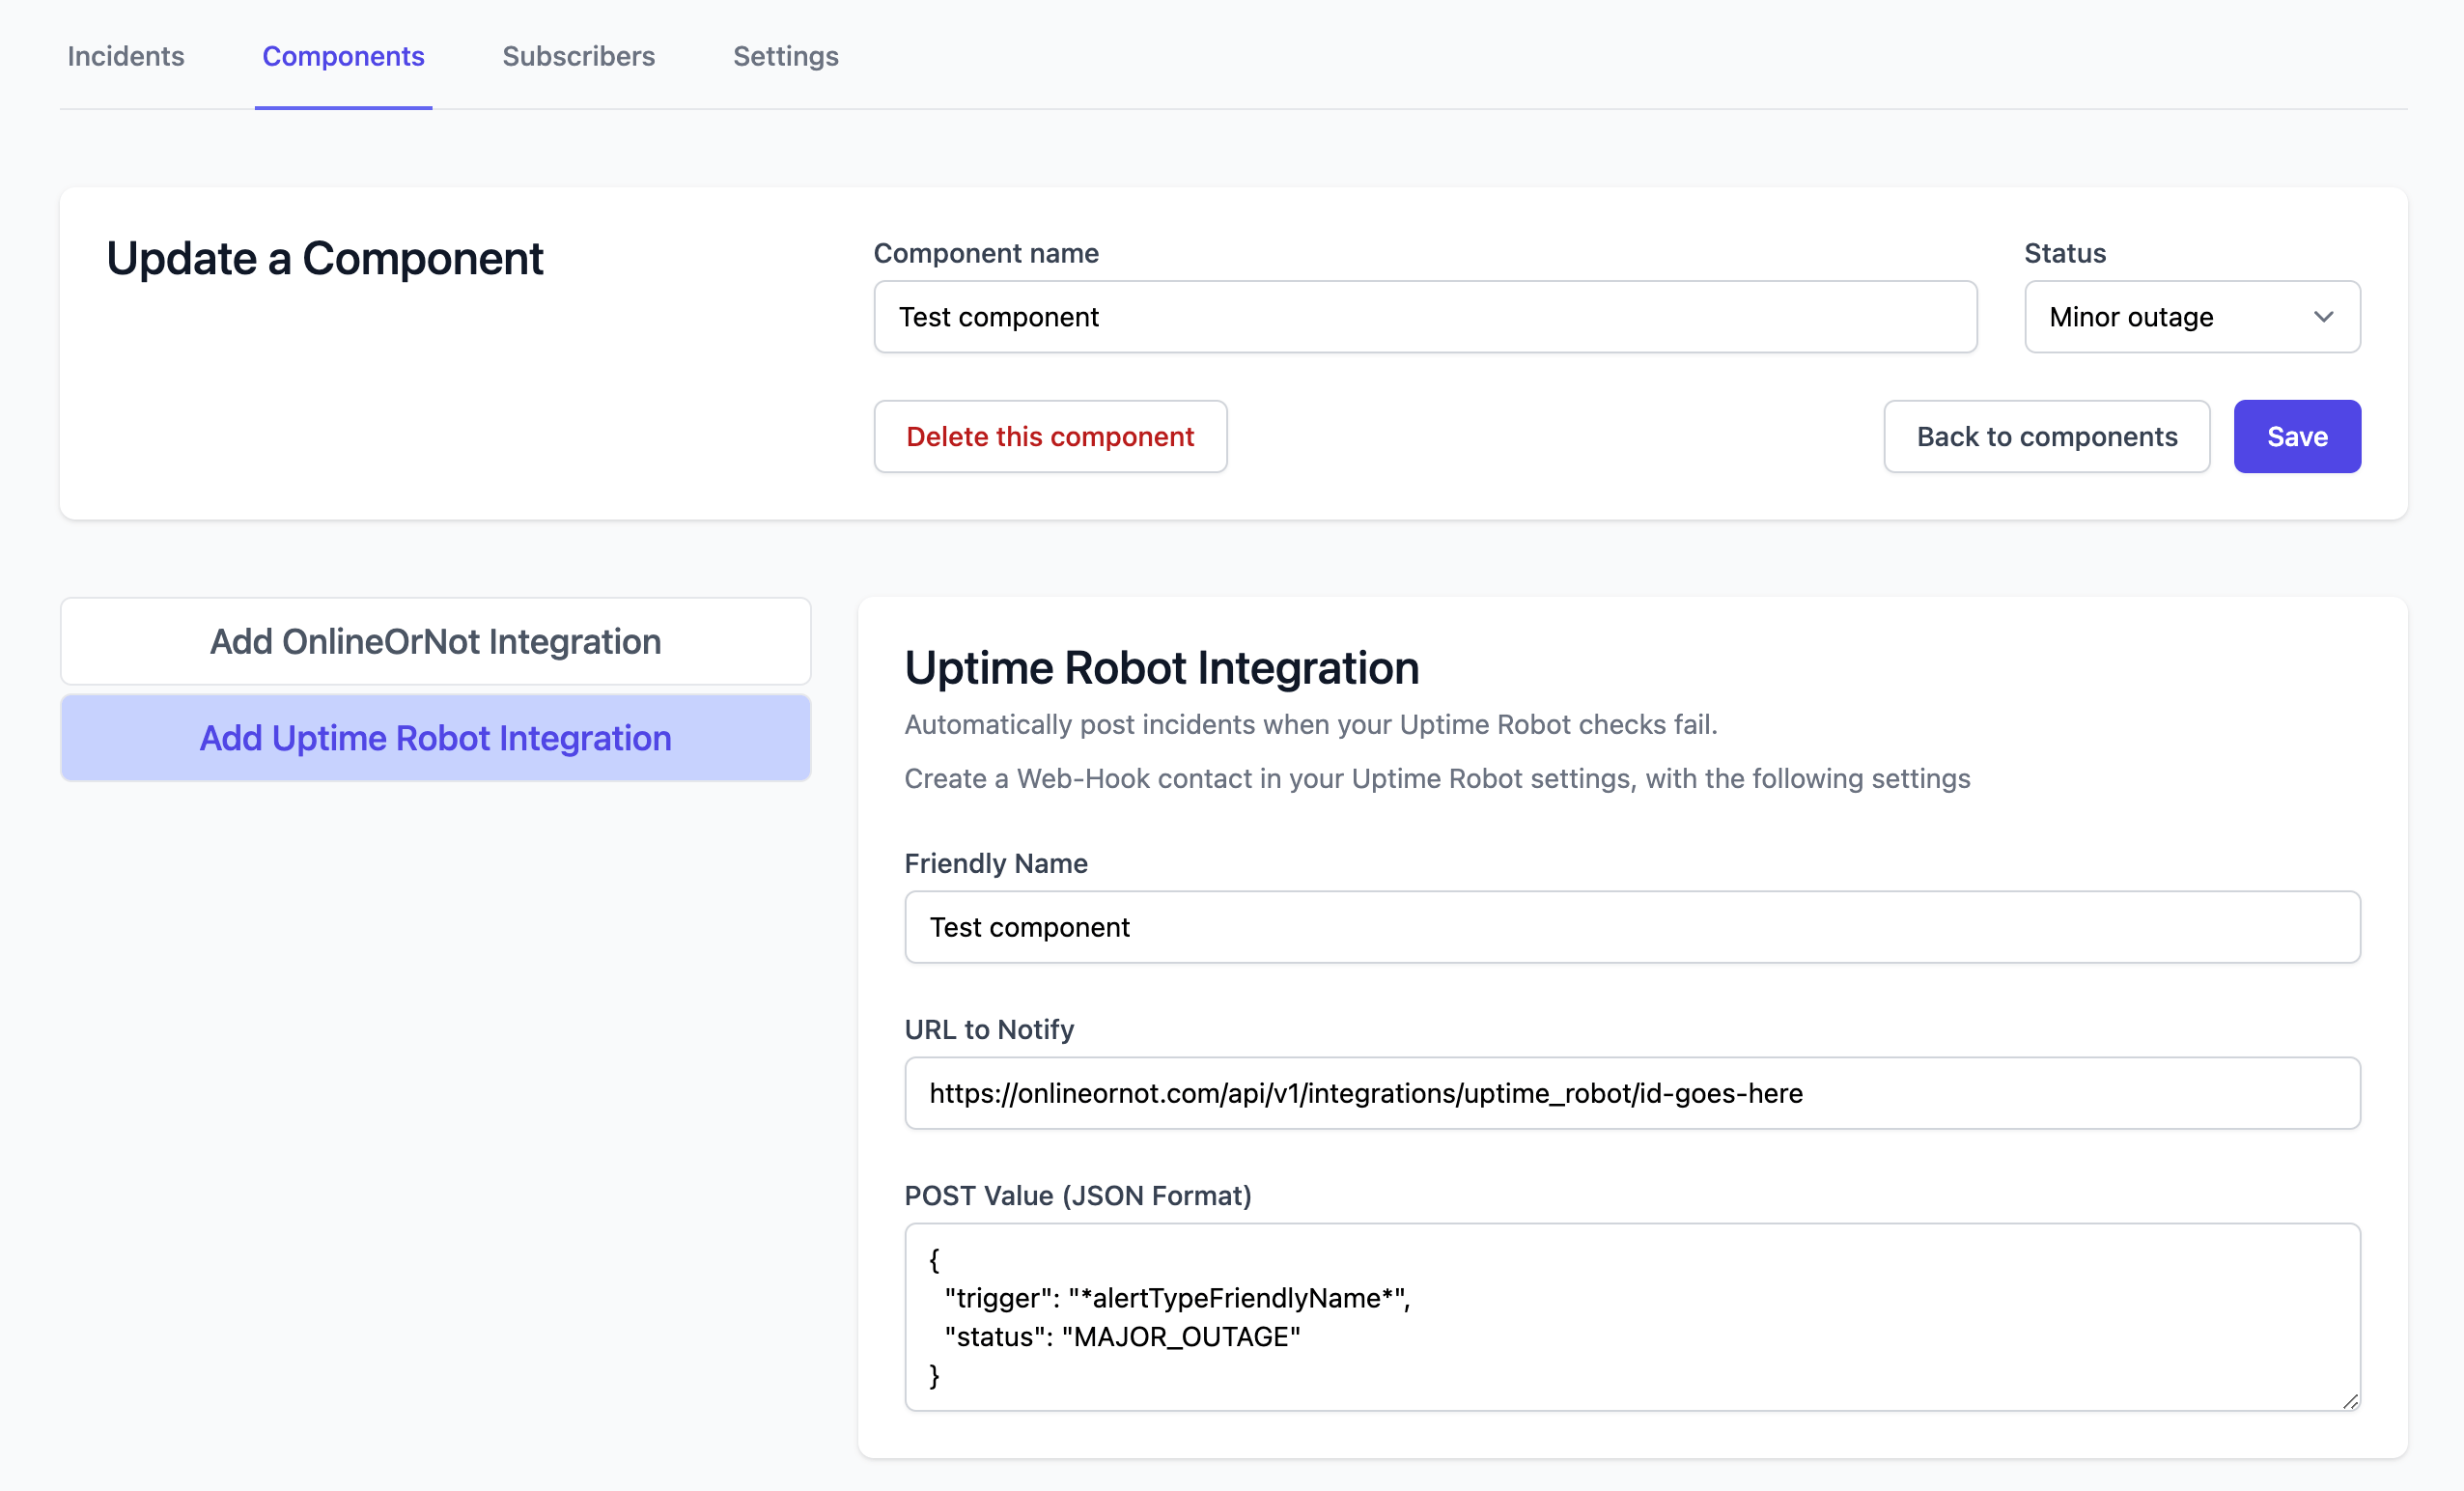
- Click on Add Uptime Robot Integration in the sidebar
If you're in the right place, you will see the following screen:

Keep this page open, as you will need to copy these settings into Uptime Robot.
Uptime Robot Settings
- Open Uptime Robot
- Click on My Settings in the top menu
- Scroll down to Alert Contacts, and click Add Alert Contact
- For Alert Contact Type, click Webhook
- Copy paste the settings from OnlineOrNot into Uptime Robot
- Ensure "Send as JSON" is ticked
Sending Uptime Robot alerts to OnlineOrNot
Now that you've added your status page component in Uptime Robot, when creating or editing alerts in Uptime Robot, you can set it as an alert contact.