Integrations
Connect Pingdom to your status page
Automatically create and resolve incidents on your OnlineOrNot status page when Pingdom checks change status.
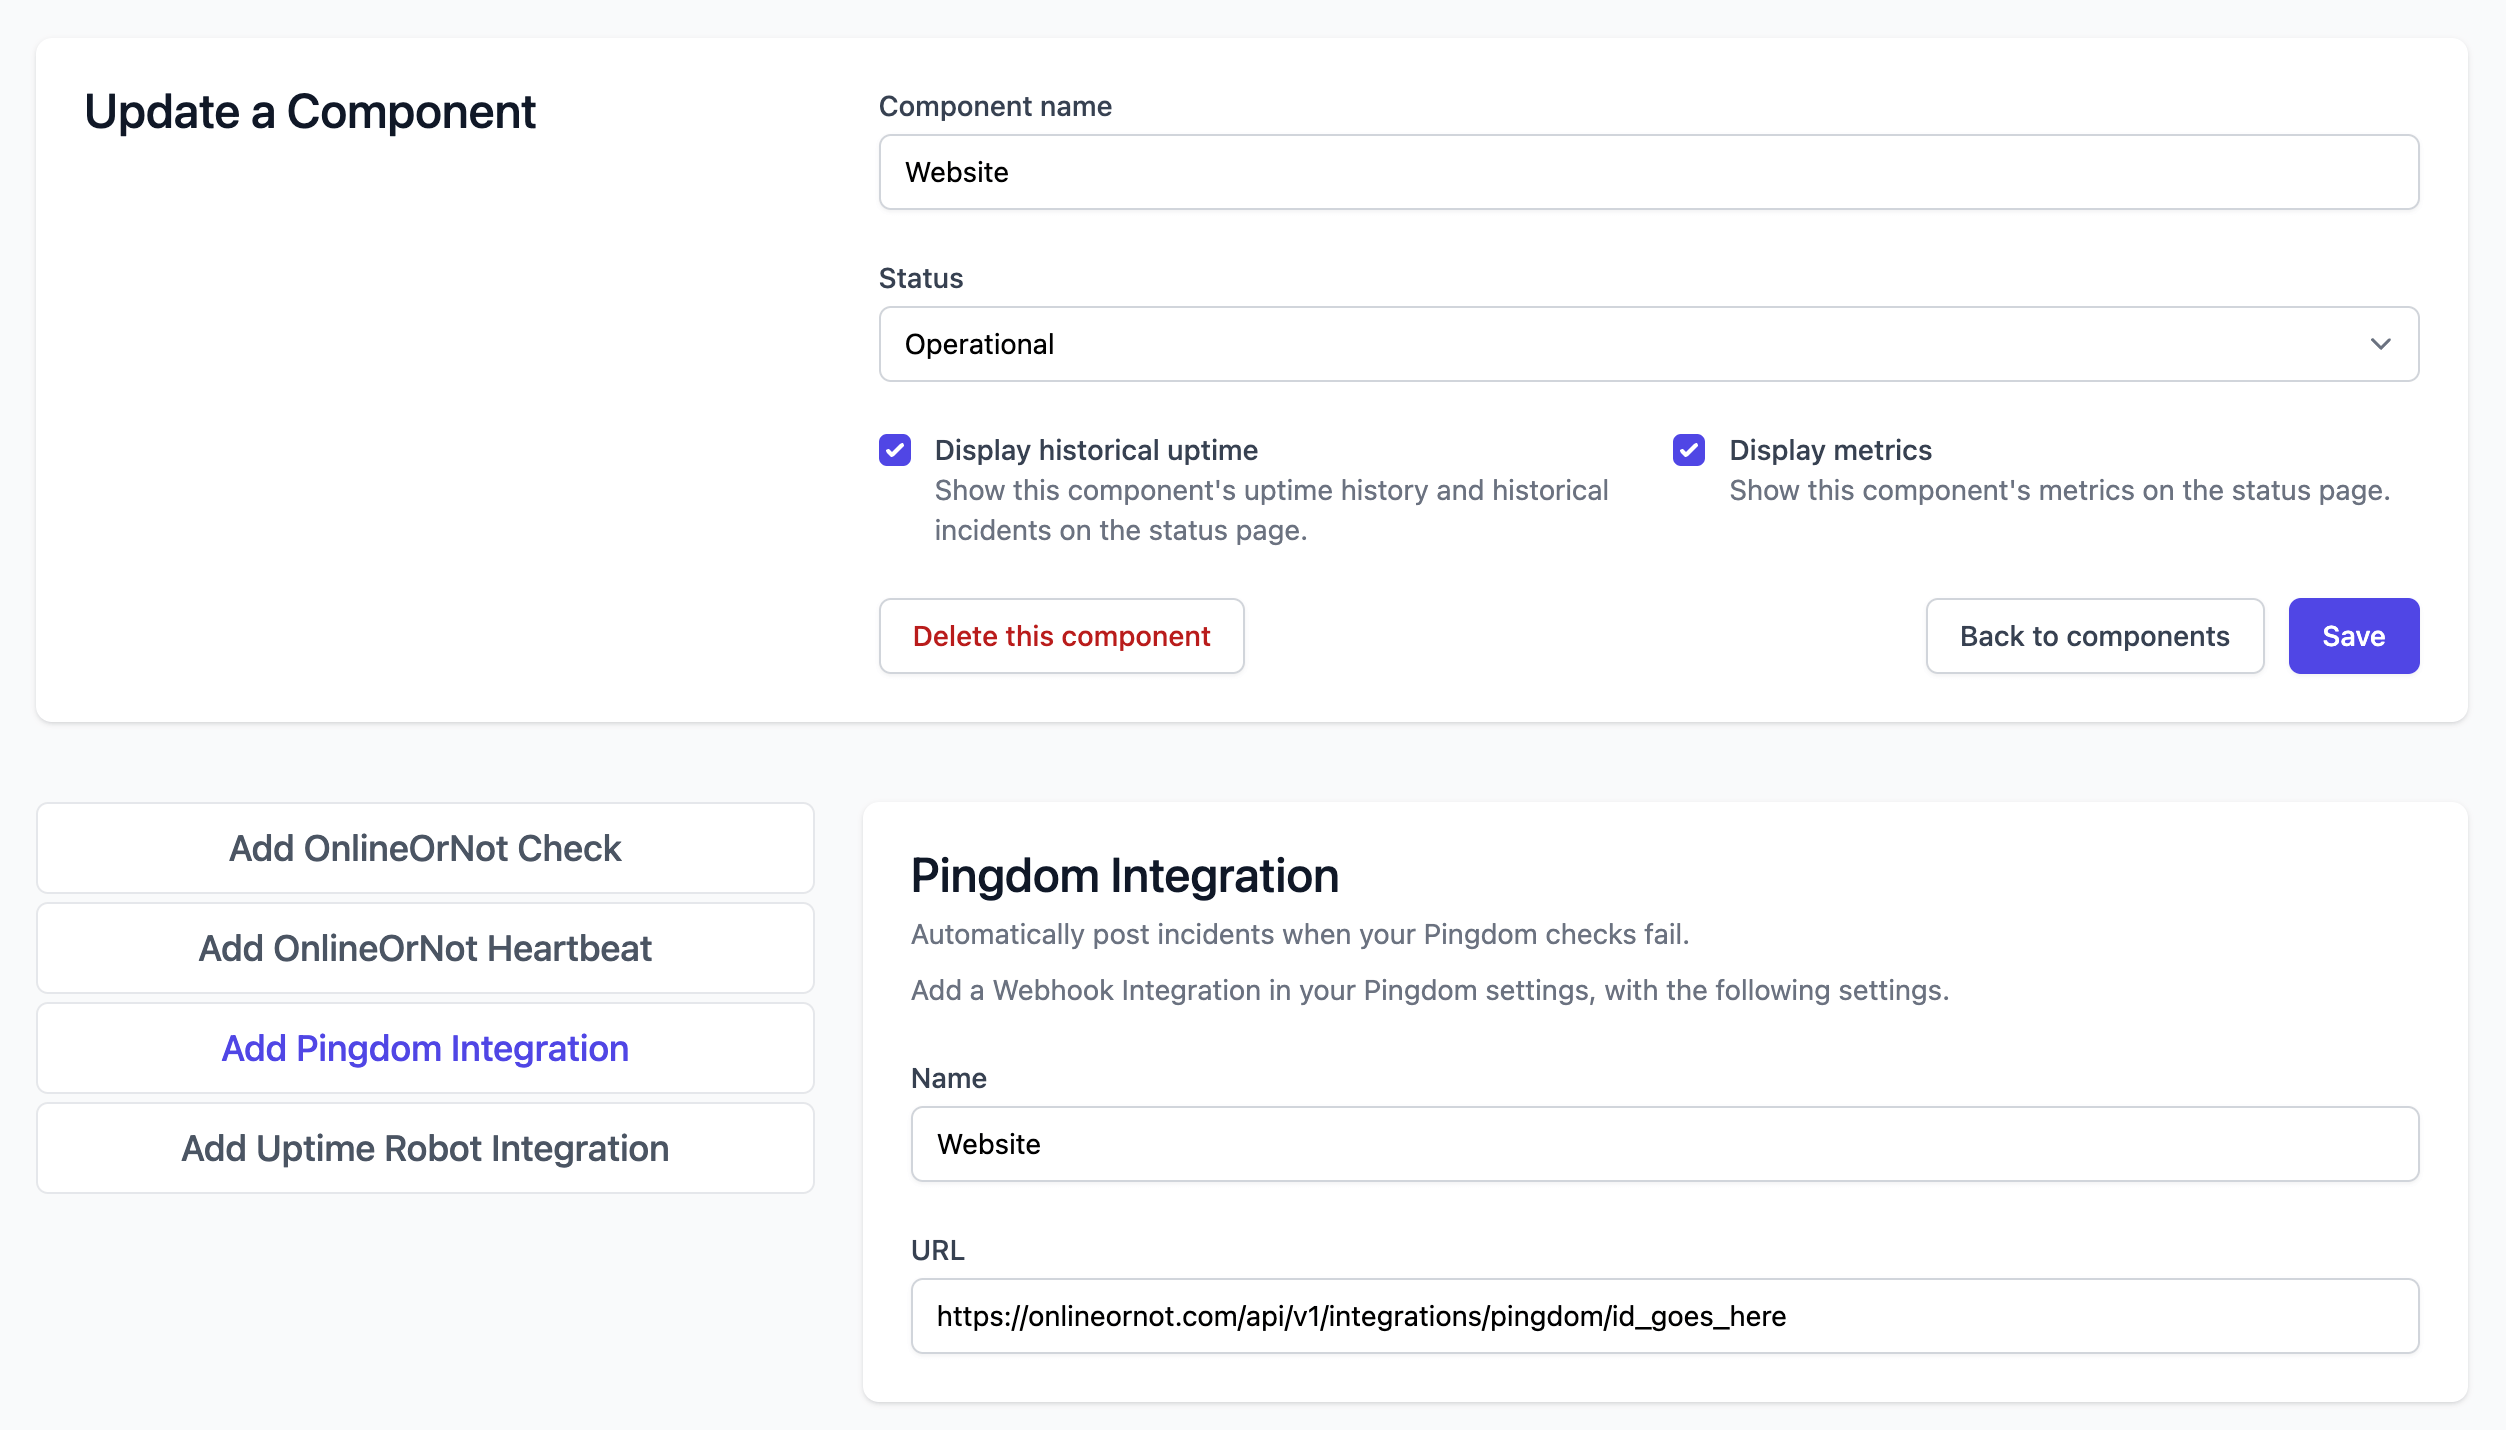
Note: Repeat these steps for each component you want to link.
Get OnlineOrNot webhook settings
-
Click Status Pages > your status page > Components
-
Click Add Pingdom Integration in the sidebar
-
Keep this page open
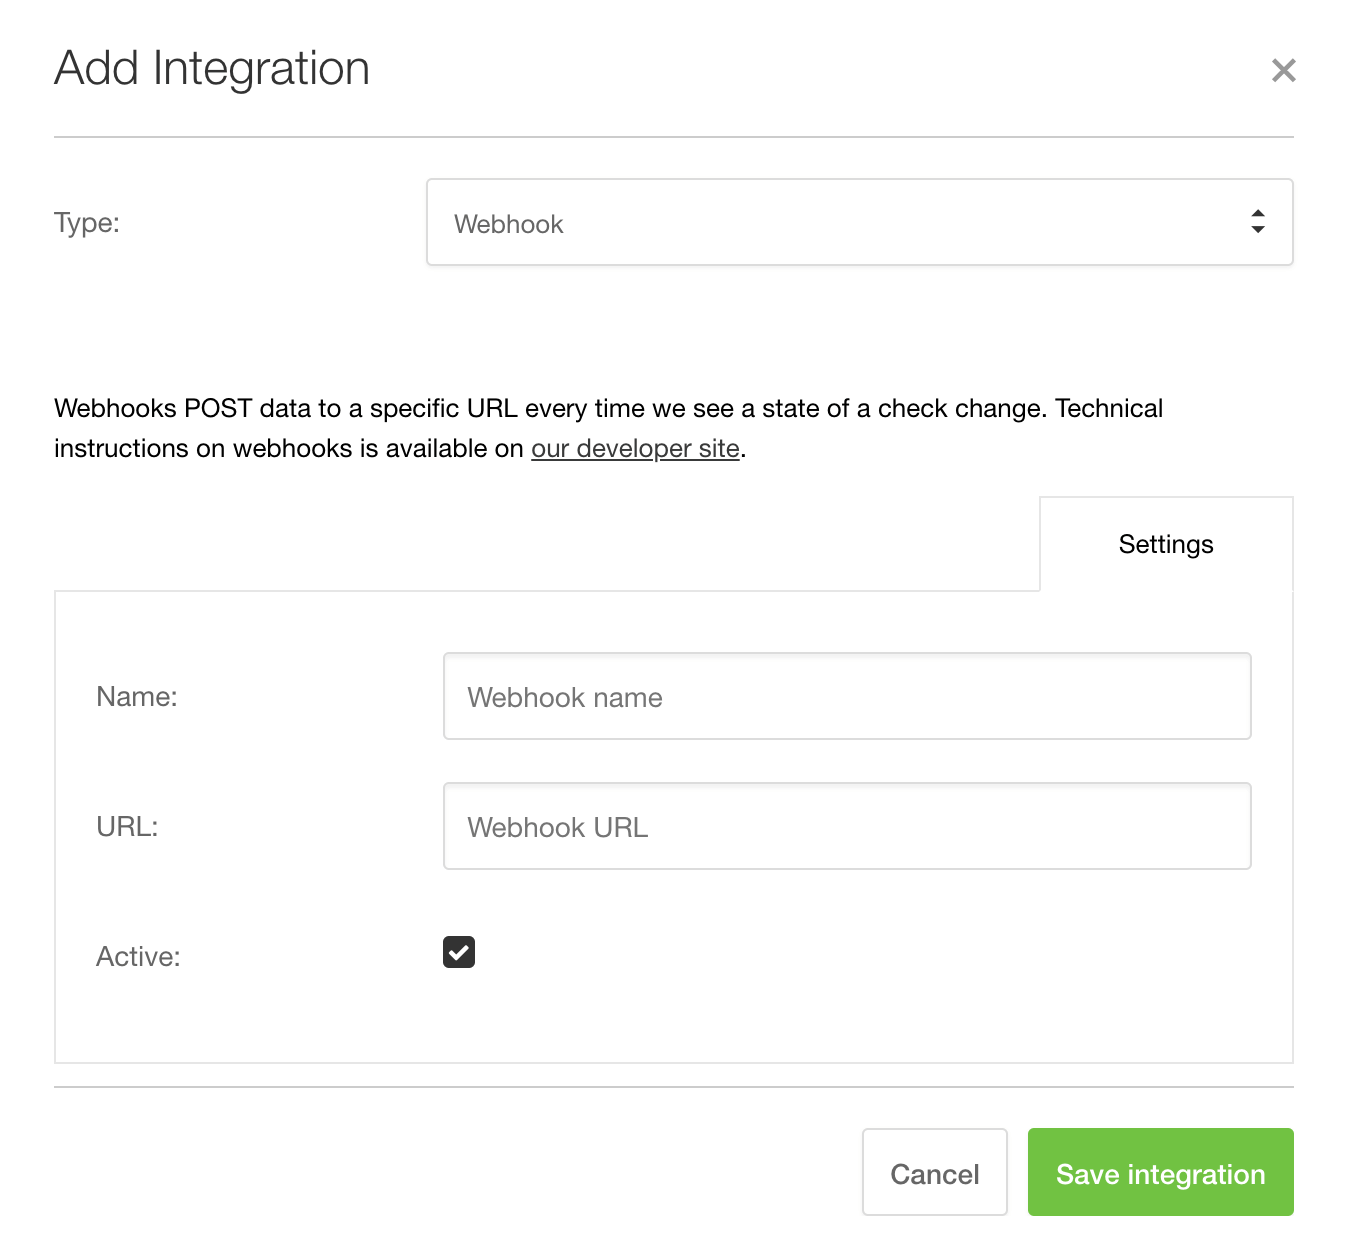
Configure Pingdom
-
Click Settings > Integrations > Add integration
-
Set Type to Webhook
-
Copy the Name and URL from OnlineOrNot
Send alerts to OnlineOrNot
When creating or editing Pingdom checks, enable the webhook under Optional > Connect Integrations > Webhook:
